Search Results for: period

Cervical Mucus: All You Need To Know

Your body speaks to you in many ways. Sometimes, it may even be in the color, consistency, and amount of cervical mucus that you produce during a monthly cycle or pregnancy.

Like every other means of communication, it is possible to miss the signs and lose the message.

Thankfully, there’s a way out. In this article, you’d discover everything you need to know about your cervical mucus; what is it, its importance, and how it can speak to you.

Read on to learn more!

First, What Is Cervical Mucus?

In plain terms, cervical mucus is the fluid or gel-like discharge released from your cervix during your monthly cycles or in the early stages of pregnancy. Sometimes, it is also referred to as vaginal discharge.

Cervical Mucus

As we mentioned earlier, cervical mucus may vary in color, consistency, and volume during your monthly cycle and pregnancy.

Although these changes are usually mild, it is possible to identify them and use them as an indicator of pregnancy or fertility.

How Important Is Cervical Mucus?

This jelly-like blob discharge from your cervix serves the following functions:

1. Protection

Your cervical mucus protects your body from infection by preventing beneficial bacteria from leaving your urinary tract. In the right amount, these bacteria maintain the alkalinity of your vagina, thereby keeping it healthy.

During pregnancy, the cervical mucus thickens to form a plug that protects the cervix from unwanted organisms like viruses which may creep in and harm the growing baby.

cervical mucus

Furthermore, this important discharge protects sperm from the highly acidic environment of the vagina.  

2. Sperm Transport

At the most fertile period of your cycle, your cervical mucus helps move sperm from your vagina to the site of fertilization in your uterine tubes. At other less fertile points in your cycle, this cervical discharge becomes thick enough to prevent sperm entry and transport to the cervix.

3. Fertility Indicator

For many women around the world who are trying to conceive, the amount and consistency of their cervical mucous serve as a reliable indicator of the best time to conceive.

4. Lubrication

Cervical mucus lubricates your vagina. This really important function prevents irritation and pain during sex. In addition, this lubricating feature of your cervical mucus also serves to prevent vaginal infections.

What Your Cervical Mucus Says About Your Body

If you’re trying to get pregnant, it’s really important to understand the language of your cervical mucus.
Medical experts agree that normal cervical mucus is thin, clear, and has a mild odor that is not offensive.

As we mentioned earlier, observing the changes in your cervical mucus is a helpful tool while trying to conceive. In fact, certain medical experts argue that observing and following cervical mucus changes is about 90% accurate in predicting the most fertile periods of your cycle.

To help you understand this process better, we’ve compiled a list that explains the relationship between your cervical mucus and fertility.

Here you go:

1. Infertile Mucus

This usually happens right after a period. In most women, the infertile cervical mucus is often ‘blob-like’, thick, and dry. As a result, sperms cannot pass through the mucus to reach the cervix for conception to occur.

2. Potentially Fertile Mucus

Eventually, the infertile mucus thins out and increases in volume. At this point, sperms may pass through but it is unlikely that pregnancy would occur in the presence of potentially fertile mucus secretion.

3. Fertile Mucus

Fertile cervical mucus usually feels wet and very slippery. In most cases, the mucus is clear, cloudy/white in color. Most women also agree that fertile mucus is more abundant in volume than any of the other types of cervical mucus mentioned earlier.

4. Highly Fertile Mucus

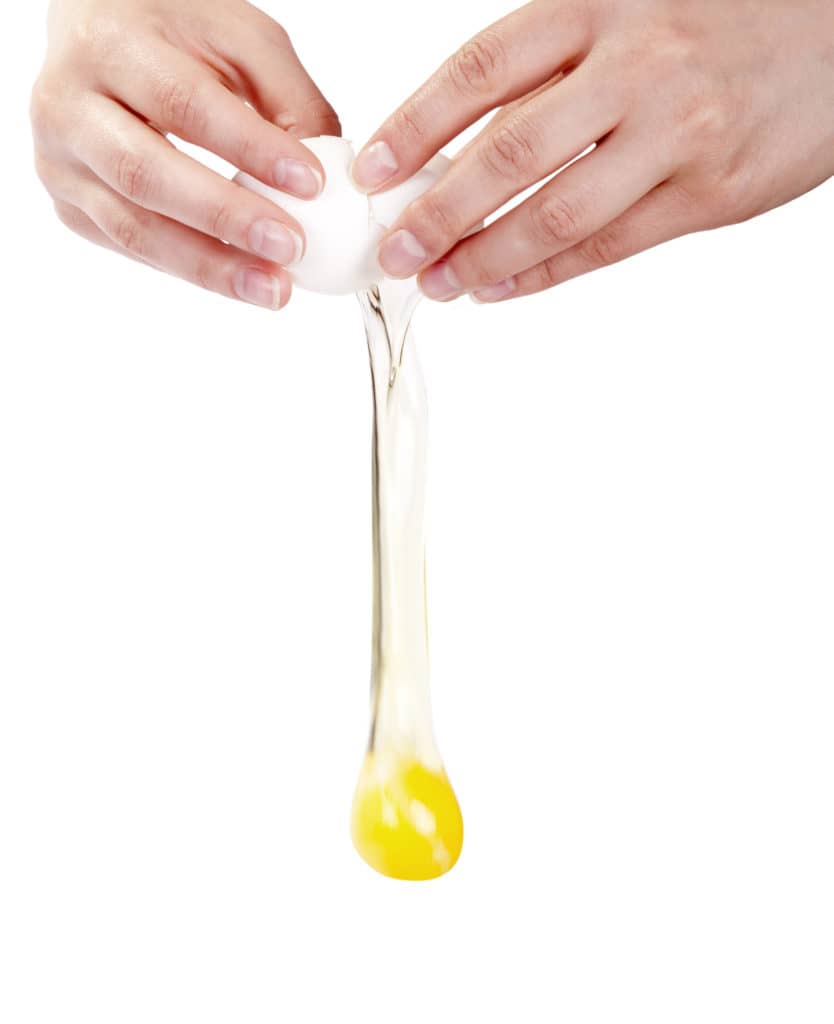
As your body prepares for ovulation, your mucus will attain a classic ‘egg-white’ appearance. That is, it becomes thin, clear, and stretchy. As you’d expect, highly fertile mucus is thin enough for sperm to swim through.  
cervical mucus

However, it is important to remember that every woman’s body is different. Your cervical mucus differs from every other person’s. Therefore, you need to be patient and very observant while using cervical mucus as an indicator of fertility.

Abnormal Cervical Mucus

If you observe any of these features in your cervical mucus, it is a sign that something is not right:

  • Foul Smell
  • Green/Yellow/Gray Color
  • Itching
  • Irritation

If you notice any of these signs, it’s really important to consult your doctor for proper examination and treatment.

cervical mucus

How to Improve the Quality of Your Cervical Mucus

As we mentioned earlier, your cervical mucus is an indicator of the overall health of your reproductive tract and fertility status. Therefore, it is really helpful to keep an eye on the quality and quantity of your cervical discharge at every point of your cycle.

Thankfully, you can improve the quality and quantity of your cervical mucus by:

  • Regulating your caffeine consumption
  • Drinking enough water everyday

Click here to learn all you need to know about caffeine consumption during pregnancy.

Conclusion

Finally, it is important to remember that cervical mucus monitoring is not the most accurate indicator of fertility or pregnancy. Also, slight changes in your cervical mucus are normal in the early stages of pregnancy. Nevertheless, a proper pregnancy test is the best way to confirm pregnancy.

As you pay attention to the changes in your cervical mucus, understanding the significance of these variations may be all you need on your fertility journey.

References

Curlin M, Bursac D. Cervical mucus: from biochemical structure to clinical implications. Front Biosci (Schol Ed). 2013 Jan 1;5:507-15. doi: 10.2741/s386. PMID: 23277065

Kumar P, et al. (2012). Hormones in pregnancy. DOI:
10.4103/0300-1652.107549

MARCUS SL, MARCUS CC. CERVICAL MUCUS AND ITS RELATION TO INFERTILITY. Obstet Gynecol Surv. 1963 Oct;18:749-72. doi: 10.1097/00006254-196310000-00027. PMID: 14052300.

When To Pierce Your Baby’s Ears

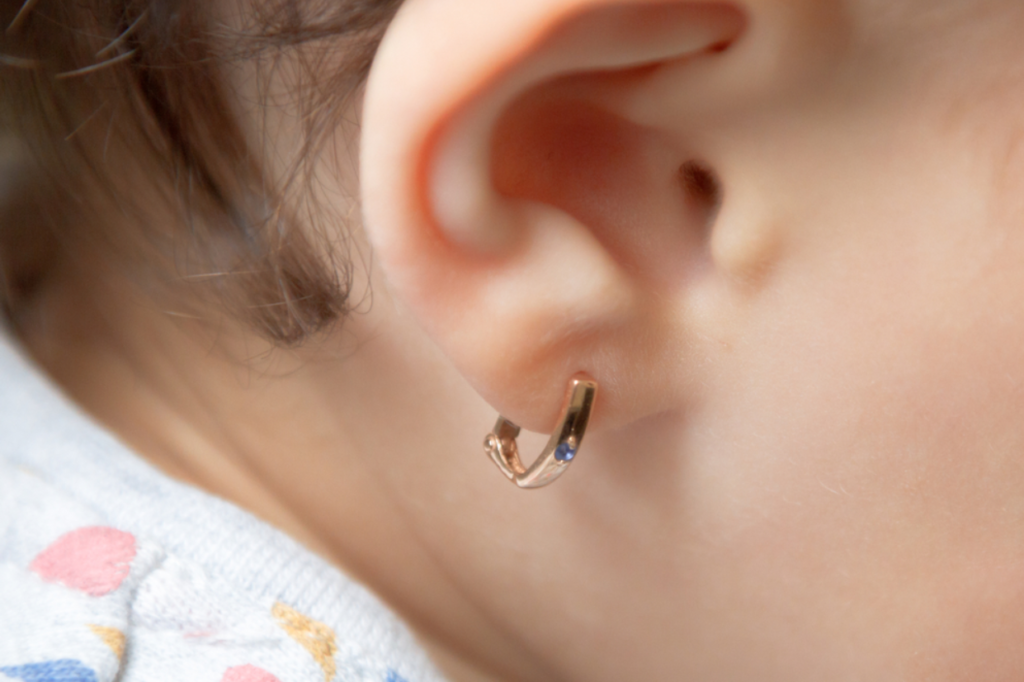
Your baby’s ears are a lot like yours; made for hearing but with enough room to accommodate those cute piercings. These days, baby ear piercing has even become more common in many countries.

Of course, you may also be trying to figure out the best time to pierce your baby’s ears; do you want to wait until your little one is old enough to make personal choices? Or would you rather get it over with while your child is still a newborn?

No matter what side of the fence you sit on, this article is for you.

In this post, we’d walk you through the process of baby ear piercing; what it is, when to get it done, the possible complications, and things to note after piercing your baby’s ear. As a plus, we’ve added a section on essential tips for baby ear piercing.

Don’t Stop Reading!

Baby Ear Piercing

Yes, we know that the concept of baby ear piercing is a controversial one based on cultural, social, and religious variations. In fact, the American Academy of Pediatrics recommends waiting till your child is old enough to make the decision about ear piercing by him/herself.

However, it is important to note that this recommendation is more about allowing children make personal choices by themselves than the possibility of any health problem involved in the process.

Furthermore, the decision on when to pierce your baby’s ear also depends largely on the ability to reduce the possibility of an infection. Once this is sorted out, either by proper parental care or allowing the child grow old enough to care for his/her own ear, you’re good to go.

 When to Peirce Your Baby’s Ear

Here’s the fact: There’s no perfect time to pierce your baby’s ear.

As we mentioned earlier, factors like culture and religion are also important roles in figuring out the best time to pierce your baby’s ear. In fact, we believe that the decision on when you pierce your child’s ear solely lies in your own hands.

Nevertheless, it is very important to consult your pediatrician before piercing your baby’s ear. Most doctors recommend waiting for about three months after birth before taking this step.

In addition, we also recommend waiting till your child has gotten the tetanus vaccine before getting their ears pierced. This would protect him/her from germs or infections associated with this process.

As a result, most parents believe that the best time to pierce your child’s ear is when he/she is about two months old.

Furthermore, at this age, children are still unable to identify the exact location on their bodies that is causing pain, so you don’t have to worry about them pulling the earring off to ease the pain.

Essential Tips for Baby Ear Piercing

1. Do It After Vaccination

As we mentioned earlier, two months after birth is a suitable time to pierce your baby’s ears because it coincides with your child’s first round of vaccine shots. This way, you get to shield your child from germs and reduce the possibility of infections.

2. Older Babies Can Localize Pain

By the time your child is about 6 months old, she can identify the specific location of body pain. As a result, she is more likely to tug the earrings in order to reduce the pain. To avoid this, the best option is to pierce your child’s ear after about 2 or 3 months of life.

baby chewing fingers

3. Go for Gold

Studies show that babies do not react to pure gold earrings. If you can, go for 24 karat medical-grade gold-plated stud earrings to minimize the risk of an allergic reaction. Another safe option for baby earrings after piercing is sterling silver.

4. Keep an Eye Out for Infections

In the first few days after piercing your baby’s ear, you need to keep an eye out for any or all of the following signs:

  • Pus-filled discharge
  • Redness
  • Tenderness

Most times, these are the tell-tale signs of a possible infection.

5. Use Sterile Equipment

This bit is very important.

While preparing to pierce your baby’s ears, it is super important to ensure that all equipment to be used is sterile and a qualified person is handling the process. In fact, some pediatricians agree to handle baby ear piercing in the confines of their office. This way, you’re assured of sterility and professionalism.

6. Don’t Take Off the Earrings

Weird right?

In the first six weeks after piercing your child’s ear, do not take off the new earrings. This would give the wound enough time to heal. In this period, you can prevent infections by cleaning the site regularly.

Possible Complications of Baby Ear Piercing

As we mentioned earlier, baby ear piercing is a unique procedure that may cause some complications if it is not done properly.

Some of these complications include:

  • Allergic reactions
  • Bleeding
  • Infection
  • Ear deformation

However, as long as you follow all the tips mentioned in this post and consult your pediatrician regularly, you don’t have to worry about these complications.

Things to Note After Piercing Your Baby’s Ears

If you’ve already taken the big step to pierce your baby’s ears, we’ve compiled a few important facts to note:

1. Allergies May Happen

In some rare cases, children may react to gold, which is a common material for earrings. As a parent, you can identify allergies in children by watching out for any of the signs mentioned earlier in this article. If you do notice any of these signs, please remove the earrings immediately and contact your pediatrician.

2. Aftercare Is Super Important

After piercing, you should care for your baby’s ears by cleaning and disinfecting the site regularly. This way, you’d reduce the risk of infection and help the wound heal faster.

3. Don’t Let the Jewelry Dangle

 At this stage, right after a piercing, your child should only use stud earrings. With the right pair of studs, there’s no risk of the earring getting stuck on beddings on clothing. Furthermore, there’s no chance that your little one would pull it out.

Conclusion

Finally, it is important to remember that there’s no perfect time to pierce your baby’s ears. In fact, all you need to do is follow the tips in this post and your baby is going to be just fine. You can also read up on how to clean your baby’s ears for more helpful tips.

In addition, remember to consult your pediatrician before making a decision on how and when to pierce your baby’s ears.

We are always here to lend a helping hand.

References

Brandão MH, Gontijo B, Girundi MA, de Castro MC. Ear piercing as a risk factor for contact allergy to nickel. J Pediatr (Rio J). 2010 Mar-Apr;86(2):149-54. doi: 10.2223/JPED.1980. PMID: 20361123.

Lane JE, Waller JL, Davis LS. Relationship between age of ear piercing and keloid formation. Pediatrics. 2005 May;115(5):1312-4. doi: 10.1542/peds.2004-1085. PMID: 15867040.

6 Reasons Why Babies Chew Their Hands

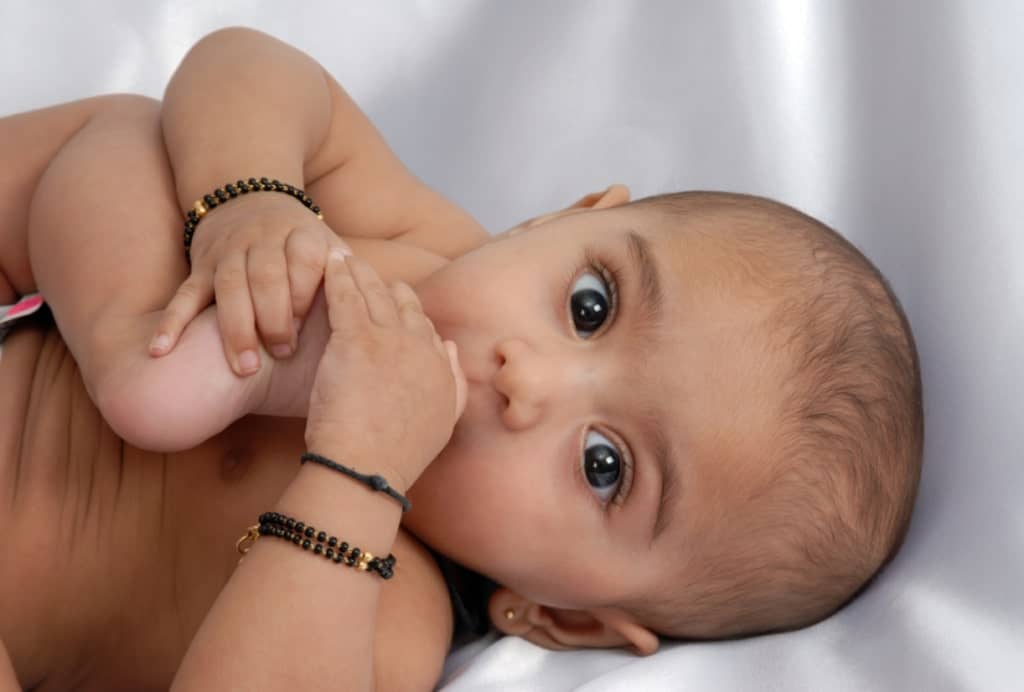
Babies have special ways of communicating. From crying to fussing, and even staring at you with those cute eyes, the list is almost endless. In fact, for most babies, chewing their fingers or thumb is a part of the package.

Although this is really common in babies, most parents can find it disturbing if their little one just doesn’t stop chewing his/her fingers.

Why Baby Chew Their Hands

Is thumb sucking normal? Why does your baby chew his/her fingers? How can you deal with thumb sucking? In this article, you’d find answers to these questions and many more.

Is Finger Chewing Normal?

Yes, it is.

However, factors like age and the underlying reason your baby chews his or her fingers, determine the extent of normality. Nevertheless, thumb sucking is a normal, and expected, part of your child’s development.

Why Your Baby Chews His/Her Hands

Understanding why your baby is chewing his or her hands depends on how much you’re able to interpret your baby’s needs. For most new parents, this is often more difficult than it sounds.

To help you out, we’ve compiled a list of the major reasons why your baby chews his/her hands.

1. Hunger

Hunger is the most common reason your baby is feeding on his or her fingers.

Finger sucking is a natural instinct for your baby. This is because each time they’re fed, they either get a nipple or a bottle. In this period, their fingers are the closest object that gives them the same impression but they don’t yet understand that only the nipple or bottle holds milk!

Baby Sucking Fingers

When your baby feeds on his or her fingers, it may be a way of saying “Mom I’m hungry!”

Other cues babies give to show that they’re hungry include:

  • Opening and closing their mouths
  • Smacking their lips

2. Finding Sleep

For babies, finding sleep (especially during sleep training) may be more difficult than you think.

In fact, your baby may be trying to put himself or herself to sleep with a finger in the mouth. This is because most babies fall asleep while feeding and so have grown to associate sleep with having a nipple or bottle in the mouth.

When this is not available, they may look for another alternative which is most likely their hands.

Baby Chewing Hands

3. Self-soothing

Sometimes, your baby may have his or her hands in the mouth due to stress or other stimulation such as noise, meeting new people, the weather, or anything that’s too overwhelming for him or her.

It would interest you to note that sucking provides a soothing and calming sensation that helps to remind your baby that he or she is fine. They may accompany this with yawning or turning their heads from left to right.

Also, if your baby does not spot you and has a struggle like a wet diaper or trying to pass a poo, finger sucking may be the first point of action to soothe himself or herself before crying starts.

4. Teething

What if it’s your older baby that is sucking on his or her finger?

In this case, teething may be to blame. Most babies begin teething between 4 and 7 months of life, therefore this doesn’t explain why a newborn chews his/her fingers.

The process of teething is usually painful and for your baby, sucking the fingers may be a means of soothing themselves. Rubbing their hands against their hurting gums helps them feel good.

Teething may also be accompanied by other symptoms such as drooling (which may cause a drool rash), frequent waking, and irritability.

5. Exploration

Here’s the funny one:

Your baby may not be hungry, teething, trying to find sleep, or soothing himself or herself. In some cases, finger chewing may just be a way of exploring this new world they’ve found themselves in.

Some babies may find chewing their fingers as a means of entertaining themselves and getting familiar with their environment. They’re just figuring out their senses and starting to learn that different things have different tastes, textures, and temperatures.

Furthermore, their sense of taste may be the only sense they depend on at this stage to differentiate things since sight and hearing have not fully developed at this stage for such functions.

Baby Fingers

6. Boredom

No toys around? No mom in view? No problem- the finger is the next best alternative.

If your baby does not find any other thing to do after the usual daily routine which includes eating, crying, sleeping, pooping, and there’s no one else around they can play with, their fingers may become the next best item to play with.

Do babies outgrow Finger Chewing?

Definitely!

Most babies outgrow finger chewing by around 6 to 7 months while some may persist till around 2 years. This is because as your baby grows, he or she finds new things to play with and also learns to communicate their needs with gestures and later on, verbally.

Eventually, there’s usually no need for him/her to chew on their fingers anymore.

How To Deal With Your Baby Chewing Their Fingers

Although finger chewing is normal and not harmful for babies, it is important to ensure that your baby’s hands are constantly clean. This would help reduce the risk of infections or stomach discomfort arising due to finger chewing.

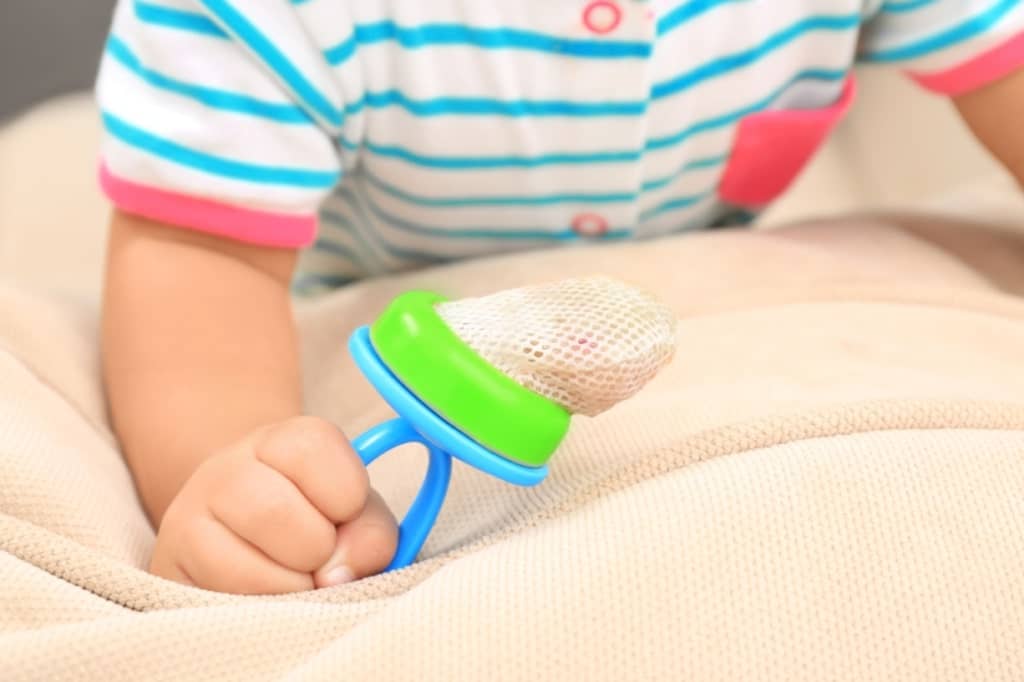
If you can, try to get rid of the stimulus causing them to chew their fingers, especially in cases of hunger or wet diapers. Also, ensure that your baby is not in any form of pain or discomfort. If teething is the culprit, you may need to get a cold teething ring which helps to relieve the pain they may be having.

Baby Hands

Finally, providing toys to play with as an alternative to finger chewing is also helpful. However, you need to make sure that the toys are always neat – it may be the next thing your baby is putting in his or her mouth. You also need to ensure that the environment around your baby is safe.

When To Get Worried

Thankfully, there’s almost no need to fret about finger chewing. In fact, there’s absolutely no need to worry except your child still chews the fingers after the age of four. At this age, you may want to consult your doctor to make inquiries about your child’s oral development.

References

Sherry A. Ellingson, Raymond G. Miltenberger, Jason M. Stricker, Matthew A. Garlinghouse, Jennifer Roberts, Tami L. Galensky and John T. Rapp (2000). Analysis and treatment of finger sucking. Journal of Applied Behavior Analysis 33(1):41-52. Accessed on 13th November, 2021 from https://www.researchgate.net/publication/12577235_Analysis_and_treatment_of_finger_sucking

Staufert Gutierrez D and Carugno P. (2021). Thumb Sucking. StatPearls [Internet]. Accessed on 13th November, 2021 from https://www.ncbi.nlm.nih.gov/books/NBK556112/#_NBK556112_pubdet_

Pregnancy Skincare Routine: Essential Things To Note

Skin changes are really common in pregnancy. In fact, the type, duration, and intensity of these changes vary for each woman. See also advanced maternal age. Nevertheless, you need to keep a close eye on your skincare routine while pregnant because some of the ingredients used to combat these skin changes may not be healthy for your baby.

This is because some of the ingredients may be absorbed into the body, cross the placenta, and cause harm to a developing baby.

Pregnancy Skincare Options

In this article, you’d find some of the common skin changes during pregnancy, why you should avoid certain skincare routines during pregnancy, and the right products to use in this period.

Common Skin Changes During Pregnancy

Pregnancy-related skin changes do happen. Just like many other changes that come with pregnancy, the hormones are culpable. These skin changes may also be a result of increased oil secretion and increased sensitivity to the sun, which happens during pregnancy.

Although some moms-to-be get to enjoy a perfect skin tone while expecting, others may experience some serious skin changes in this period.

In most cases, these changes include:

  • Dark and dry skin
  • Acne
  • Eczema
  • Psoriasis

Why You Need To Avoid Certain Skincare Products

What you put on your body during pregnancy is just as important as what you put in your body (that is, your pregnancy diet). In fact, we recommend that you pay close attention to both angles. This is really important because your body can absorb some harmful ingredients from your skincare products. Even if these potentially toxic ingredients do not harm you, they may cross the placenta and affect your baby’s development.

pregnancy skin

What causes this difference?

These products may not be harmful to an expecting mother because your body has the ability to break it down and excrete it. On the other hand, your developing baby, whose system is not strong enough, may not be able to break these products down. Instead, they accumulate and cause harm to your baby.

Thankfully, not all the ingredients in your skincare product cause harm to your baby. In fact, researchers have identified most of these harmful chemicals. As you’d expect, we’ve compiled all that juicy info for you.

Keep reading to find out!

Skin Care Products To Avoid During Pregnancy

1. Salicylic acid

Salicylic acid has anti-inflammatory properties, making it useful in the treatment of acne. Recent studies have shown that high doses of anti-inflammatory substances which include salicylic acid can be dangerous to your developing baby.

However, the American College of Obstetricians and Gynecologists (ACOG) has stated that salicylic acid in low doses is safe for your baby.

2. Retinoids

Retinoids are useful by-products of vitamin A in the body. They are generally used for good skin, eye, and reproductive health. They have proven to be very useful in combating acne, common skin changes before and during pregnancy.

High doses of both oral and topical retinoids in the body have been associated with an increase in birth defects and should be avoided during pregnancy.

If you’re using products rich in retinoids to combat acne, it is important that you stop the medications about 1-2 months before trying to get pregnant.

3. Hydroquinone

Hydroquinone is a potent ingredient in products used to lighten dark skin (hyperpigmentation). Research to justify the relationship between hydroquinone and increased birth defects is limited but hydroquinone is absorbed in high percentages so it is advisable to limit exposure to it during pregnancy.

4. Chemical Sunscreens

Oxybenzone is a common substance used in ultraviolet (UV) filters in chemical sunscreens. Although it has skin-protective effects, this chemical also has several adverse effects. For example, oxybenzone has the ability to alter the normal function of the endocrine system.

pregnancy safe sunscreen

Experts recommend that you avoid using oxybenzone-containing sunscreens because this compound is harmful to developing babies.

In this article, you’d find all the info you need to select the right sunscreen to use during pregnancy.

5. Phthalates

Phthalates disrupt the endocrine system. Even though it’s a popular ingredient of many skincare and beauty products, studies show that phthalates can cause serious reproductive and hormonal dysfunction. It is better to avoid their usage during pregnancy.

6. Formaldehyde

The truth is, the use of formaldehyde as a preservative and disinfectant in beauty and skincare products has diminished, because it is a known carcinogen (cancer-causing substance). According to the Centre for Disease Control, formaldehyde also increases the risk of infertility and miscarriage.

As a result, we recommend avoiding formaldehyde-based products while pregnant.

Safe Pregnancy Skincare Products To Try

Some of the safer alternatives include:

1. Water

Drinking a lot of water can help to combat dry skin during pregnancy. In addition, moisturizing products rich in cocoa butter, coconut oil, peptides, and hyaluronic acid are also useful.

pregnancy skincare routine

2. Zinc oxide

Mineral-based sunscreens are better during pregnancy than chemical-based sunscreens. Some of these minerals are zinc oxide and titanium dioxide. They help to deflect the sun rays before they get to your skin.

3. Vitamin C

Antioxidants such as vitamin C can help to treat wrinkles and prevent aging skin during pregnancy without fear of causing any harm to your baby.

Other antioxidants that are safe for use during pregnancy are vitamins B3, E, K, and green tea. Products containing physical exfoliants such as salt or sugar can also be used during pregnancy.

4. Glycolic acid

As opposed to retinoid-containing products used for acne and dark skin, glycolic or azelaic acid is a better alternative. This beneficial product reduces fine lines, brightens the skin, and enhances skin pigmentation.

However, glycolic acid in large doses is not safe during pregnancy.

Conclusion

Giving up your skincare routine completely during pregnancy is not the answer. What you should do is look through this article again to discover the skincare products that would leave your skin fresh and healthy all through this journey.

You’ve got this, Mama!

References

Pina Bozzo, Angela Chua-Gocheco, and Adrienne Einarson (2011). Safety of skin care products during pregnancy. Canadian Family Physician; 57(6): 665–667. Accessed on 11th November, 2021 from https://www.ncbi.nlm.nih.gov/pmc/articles/PMC3114665/#__ffn_sectitle

Cécile Marie, Sophie Cabut, Françoise Vendittelli, and Marie-Pierre Sauvant-Rochat (2016). Changes in Cosmetics Use during Pregnancy and Risk Perception by Women. International Journal of Environmental Research; 13(4): 383. Accessed on 11th November, 2011 from https://www.ncbi.nlm.nih.gov/pmc/articles/PMC4847045/#__ffn_sectitle

Bowed Leg in Baby: All You Need To Know

Are you concerned that your baby’s legs don’t look straight? Does your little one walk with legs spread apart, looking unsteady and like he/she is about to topple over?

Having bow legs is a common condition in children which raises a lot of concern for many parents. Most times, it indicates a normal growth and development process in children. However, it may be as a result of an underlying disease condition in rare cases.

In this article, you’d discover all you need to know about a baby’s bow leg; what it is, the symptoms, causes, and how to handle it.

Read on to learn more!

What are Bowlegs?

Your baby has a bowleg when either or both of his knees and legs are bent outward when his ankles and feet are together. It occurs as a result of incorrect alignment around the knee. Any exaggerated bowing of the leg within the 2nd year of life is regarded as physiologic bow leg.

bow leg

This is because it is considered as part of the normal growth and development of babies. Babies who develop this form of bow leg are expected to outgrow it without requiring any intervention.

Babies’ Growth and Development

Knowing the stages of growth and development will help you to understand the physiologic bowing of the leg. At birth, babies are born with bow legs. This is due to their folded position while in the womb. This bowing straightens out by the age of 18-24 months or within six months of walking.

By the 3rd and 4th year, there’s a normal change from this to curving of the leg inwards, with the knees touching each other (knock knee). Then gradually, the legs begin to assume the adult shape, achieving it by the age of about 7years. Also, it is typical to see physiologic bowing in children who started walking early or heavy babies.

Symptoms

Bowleg is easily noticed when your child is standing. Although it doesn’t affect his ability to walk, your child may walk in an awkward pattern. It is also common to see children with bow legs walk with their toes turned inward (in-toeing). In addition, the child may trip a lot while walking.

Other causes of Bow leg In babies

Even after the required period of observation, bowleg may persist in some children. When this happens, it is usually due to other causes like:

  • Rickets
  • Blount’s disease
  • Lead poisoning
  • Abnormal bone development

1. Rickets

This is a disease of the bone which occurs due to deficiency of vitamin D. This deficiency is commonly due to a lack of foods fortified with vitamin D or lack of sufficient exposure to sunlight. As a result, minerals such as calcium and phosphate needed for normal bone growth will be reduced in the body. This causes the bones to be soft and unable to carry the baby’s weight, thereby causing bowlegs.

To avoid issues like this, it is best to make sure your baby is getting the right breastmilk supply from birth, and essential vitamins in every stage of his/her diet.

baby bow

2. Blount disease

Blount disease is also known as Tibia Vara. It occurs as a result of excessive pressure on one side of the baby’s shin bone (tibia). This causes suppression of the growth on the affected side(medial) of the bone while the other side(lateral) continues to grow. Obese children and early walkers are at risk of developing bowleg from this condition. Bowleg in Blount disease affects only one leg.

3. Lead Poisoning

In some really rare instances, lead poisoning can cause bowlegs in babies. This happens when a child is exposed to unnaturally high levels of lead in the environment, diet, home, or even before birth. Children with abnormally high levels of lead in their system often develop bow legs as they grow older.

4. Abnormal Bone Development

In medical terms, this is called Osteogenesis Imperfecta. Babies with this condition develop bow legs because their bones are genetically soft, making them bend with increasing body weight as the child grows. In addition, babies with this genetic condition are prone to fractures and other bone-related diseases.

What to do when your baby has a bowleg

Physiologic bow leg does not require any treatment. This is because your baby’s leg will eventually straighten with time.

baby bow leg

However, if it persists, you should see your health care provider. After proper assessment and observation, your pediatrician will decide the appropriate line of management for your baby. Depending on the cause and severity, your baby’s doctor may recommend braces or even surgery.

Furthermore, calcium and Vitamin D-based diets or supplements are effective in the management of rickets in babies.

Conclusion

Most bow legs are physiological and they resolve naturally without any intervention. Be rest assured that it’s part of your baby’s normal growth and development. However, some other causes of bowleg in babies may require medical or surgical treatment. If not promptly attended to, they can result in progressive worsening of the bowleg and discomfort.

We are always here to help you.

References

Rerucha CM, Dickison C, Baird DC. Lower Extremity Abnormalities in Children. Am Fam Physician. 2017 Aug 15;96(4):226-233. PMID: 28925669.

Dettling S, Weiner DS. Management of bow legs in children: A primary care protocol. J Fam Pract. 2017 May;66(5):E1-E6. PMID: 28459895.

Baby Acne vs Eczema: How to Tell the Difference

Your baby’s skin is very delicate. As a result, it’s not uncommon to find rashes or minor blemishes on your little one’s skin in the early stages of life. Although this may be slightly disturbing, doctors insist that most skin conditions like acne or eczema in babies usually resolve with time.

Baby Eczema

Yes, we know that noticing a bump, rash or any other blemish on your baby’s skin may be scary. However, what really matters is knowing what condition it is and how it differs from other common skin problems in babies. For example, it may be really difficult to differentiate between eczema and baby acne.

If you’re in these shoes, you’re at the right place!

In this article, you’d find everything you need to know about these really similar baby skin conditions; the causes, symptoms, similarities, and most importantly, how to tell the difference.

Read on to learn more!

Eczema In Babies

Eczema is also called Atopic Dermatitis in medical lingo.

It is a skin condition characterized by highly sensitive and irritable skin. Eczema can be seen in babies older than six months. In most cases, it is genetic and can be passed from parent to child. Like many other infections of the skin, eczema may take certain ‘off-seasons’, where none of the symptoms are observable.

When it does appear, it may be caused by any of the following factors:

  • Stress
  • Infections
  • Extreme heat/cold
  • Humidity
  • Irritants
  • Allergens
Baby Acne
baby-acne

Common irritants that may cause eczema in babies are:

  • Harsh bathing soaps
  • Strong fragrances
  • Harsh detergents
  • Toxic chemicals
  • Smoke
  • Wool
  • Synthetic fabrics
  • Sweat

Recent medical research has even shown that eczema can also be associated with food allergies and abrupt changes in feeding techniques or routines. As a result, it is really important to ensure that your baby is on the right diet at every stage of his/her development.

Click here to learn more about the all-important baby food stages.

How To Recognize Eczema On Your Baby’s Skin

It’s a really simple task.

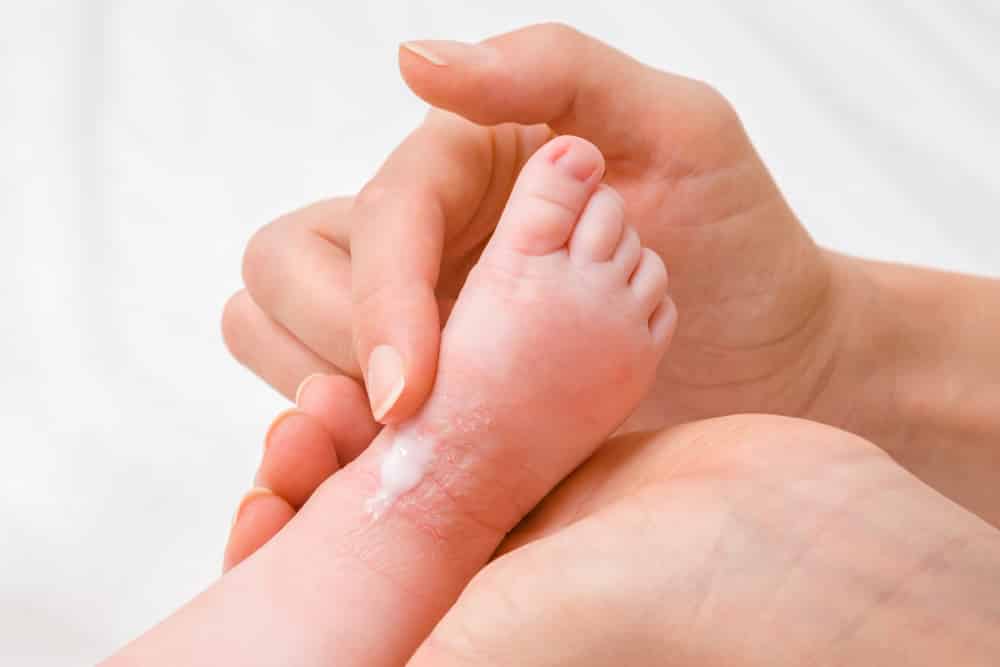
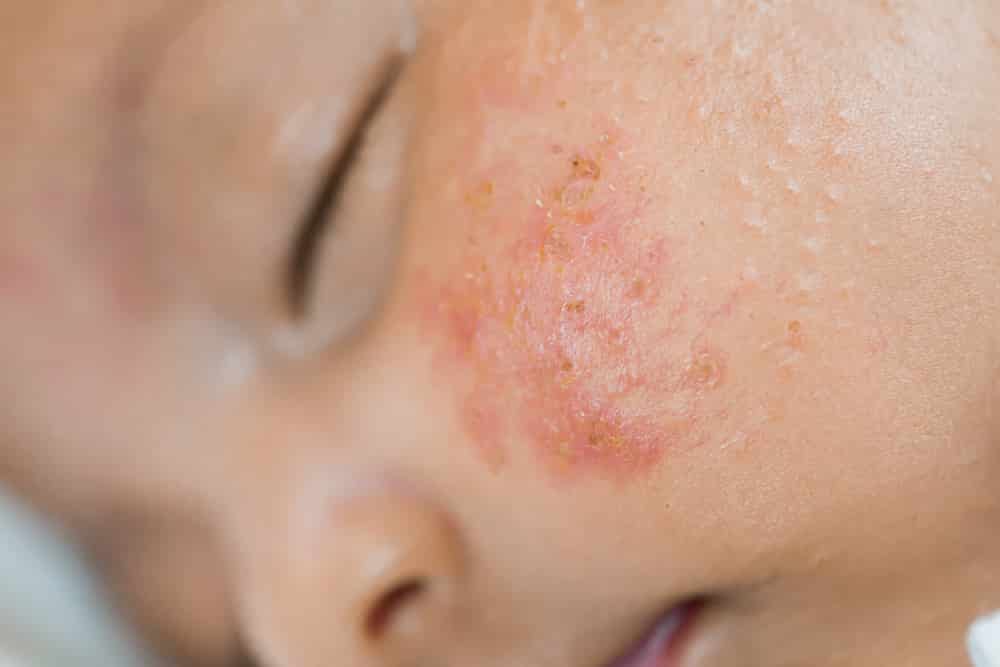
First, it is important to note that eczema often appears as a dry, red patch of skin. In most cases, this patch is very itchy and can go on to become infected. Sometimes, the itchiness may become more serious at night, thereby affecting your baby’s sleep. These rashes can be found on your baby’s face, scalp, cheeks, or arms.

Other obvious symptoms of eczema in babies include:

  • Dry scaly skin
  • Rash that oozes out clear fluid
  • Cracked flaky skin
  • Skin creases on the palms of the hand or under the eye
  • Darkening of the skin around the eyes

How To Treat Eczema In Babies

The aim of eczema treatment is to reduce the number of flares (the dark red patches) and increase the disease-free periods.

Eczema vs Acne

The following tips would help you treat eczema on your baby’s skin:

1. Adequate skin hydration

This can be achieved by;

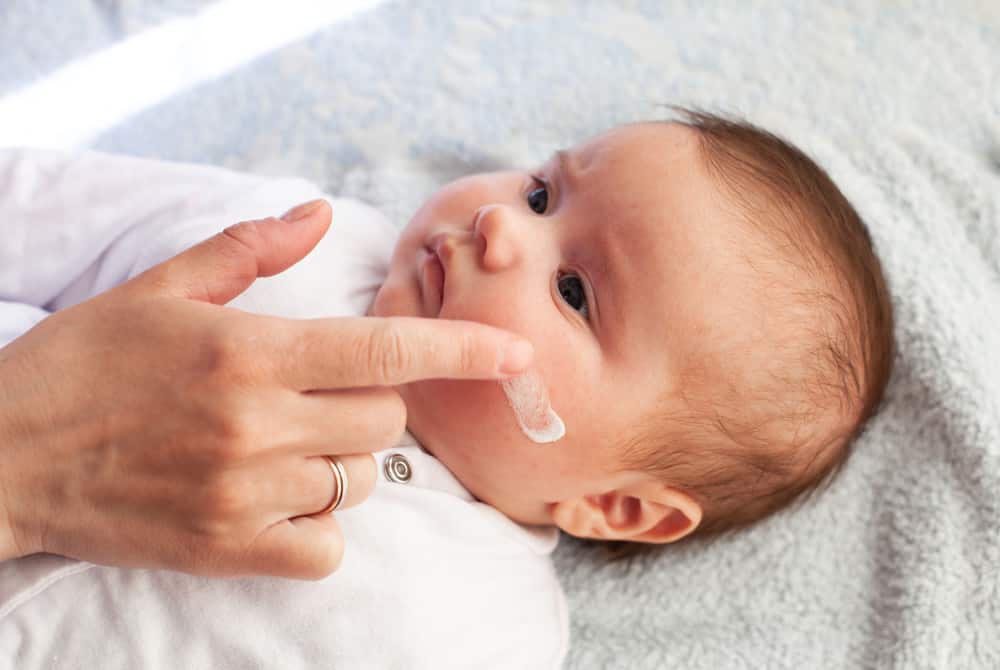
  • Giving a daily lukewarm bath and applying mild baby skincare products like coconut oil to retain the moisture in your baby’s skin.
  • Avoiding alchol based creams or lotions
  • Using a mild non soap cleanser during your baby’s bath sessions.

2. Identify and avoid triggers

If you can, figure out what irritates your baby’s skin and try to remove it. Sometimes, it can be as obvious as your dog’s fur or as innocuous as an ornamental plant. Nevertheless, removing the irritant is a sure way to manage eczema in babies.

3. Pick The Right Clothes

Dress your baby in clothing made from 100% cotton or other natural fabrics that are safer for babies. This is really helpful because these products are comfy, warm enough, and less likely to irritate your little one’s skin.

4. Speak With Your Pediatrician

In the event of a flare, kindly contact your health care provider. Your doctor may prescribe drugs like topical steroids to reduce inflammation and itching.

Baby Acne

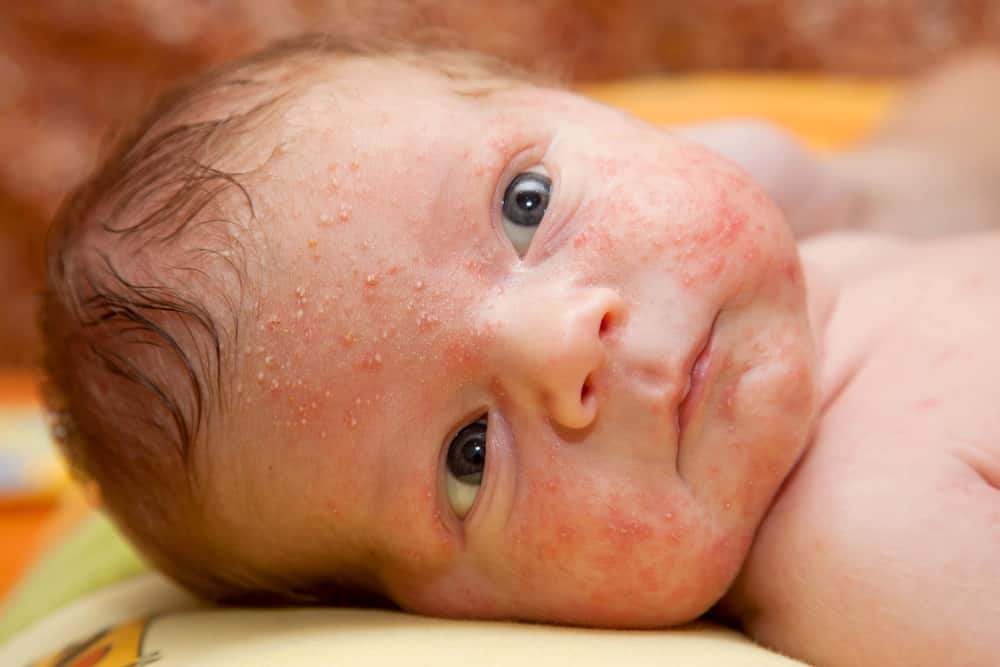
On the other hand, baby acne is a temporary skin condition that affects newborns. Most times, baby acne arises at about the second or third week of life. Although the cause is not known, this condition is really common amongst babies of this age group.

Eczema in Babies

1. How To Identify Baby Acne

Baby acne is usually present with small red or white bumps on your baby’s cheeks, nose, and forehead. These bumps sometimes can be filled with a whitish substance. In contrast to eczema, baby acne does not itch or get infected.

2. How To Treat Baby acne

Sadly, there’s little you can do to prevent baby acne.

When it occurs, it simply runs its course and disappears without leaving any scar on your baby’s skin. However, it is important to note that the duration of baby acne varies for every child. While you wait for your baby’s acne to resolve, you can apply the following tips to protect your child’s skin:

  • Keep his/her face clean
  • Avoid harsh skincare products
  • Wash your baby’s skin with lukewarm water
  • Don’t squeeze, rub or scrub off the acne as this will only irritate your baby’s skin and may worsen the problem

Conclusion

Finally, it is important to keep in mind that your baby needs some time to adjust to this whole new world. In this period, it is not strange for his/her skin to react to the changes in various ways. When this happens, you don’t need to worry, all you have to do is follow the tips mentioned in this article and everything would work out.

Your baby is going to be just fine!

References

Eichenfield LF, Krakowski AC, Piggott C, Del Rosso J, Baldwin H, Friedlander SF, Levy M, Lucky A, Mancini AJ, Orlow SJ, Yan AC, Vaux KK, Webster G, Zaenglein AL, Thiboutot DM; American Acne and Rosacea Society. Evidence-based recommendations for the diagnosis and treatment of pediatric acne. Pediatrics. 2013 May;131 Suppl 3:S163-86. doi: 10.1542/peds.2013-0490B. PMID: 23637225.

Ashton R, Weinstein M. Acne Vulgaris in the Pediatric Patient. Pediatr Rev. 2019 Nov;40(11):577-589. doi: 10.1542/pir.2018-0137. PMID: 31676531.

Chalmers JR, Haines RH, Bradshaw LE, Montgomery AA, Thomas KS, Brown SJ, Ridd MJ, Lawton S, Simpson EL, Cork MJ, Sach TH, Flohr C, Mitchell EJ, Swinden R, Tarr S, Davies-Jones S, Jay N, Kelleher MM, Perkin MR, Boyle RJ, Williams HC; BEEP study team. Daily emollient during infancy for prevention of eczema: the BEEP randomised controlled trial. Lancet. 2020 Mar 21;395(10228):962-972. doi: 10.1016/S0140-6736(19)32984-8. Epub 2020 Feb 19. PMID: 32087126; PMCID: PMC7086156.

Waserman S. Doctor, can we prevent food allergy and eczema in our baby? Curr Opin Allergy Clin Immunol. 2016 Jun;16(3):265-71. doi: 10.1097/ACI.0000000000000267. PMID: 27057796.

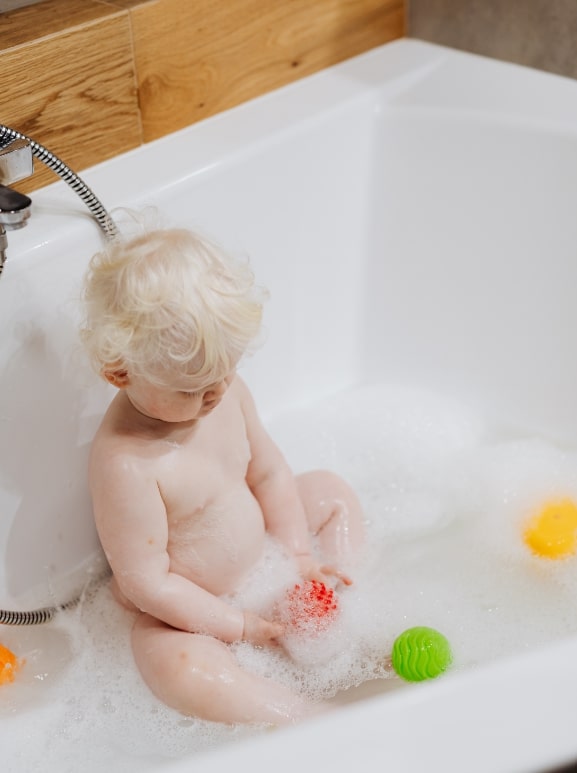
Getting the ideal safe bath water temperature for baby

Your baby’s bath times are really exciting – not only is bath time a lot of fun, but it also helps your baby’s emotional and cognitive development. However, it may not always feel this way. Sometimes, getting the right bath water temperature for your little one may be a real hassle. If you’re a first-time parent, or you just can’t get the right temperature, this article is just for you.

In this article, you’d find all you need to know about your baby’s bath water temperature; how to get it right, and why it is important. In addition, you’d also find some reliable tips on how to provide the best bath experience for your newborn.

Bath water temperature

As we mentioned earlier, one of the most pleasurable moments for your baby is his/her bath time.

Baby bath water temprature

In addition to all the fun he/she would experience in this period, a good bath would help you clean your child while spending quality time with him or her.

However, it is also important to note that every bath needs to be as safe as possible for your little one. A crucial step to achieving this is to provide an optimal bathwater temperature for your baby.

What Makes a Bath Unsafe?

Your baby’s skin is way thinner than yours.

This makes it really sensitive to extreme temperatures. As a result, hot water can easily scald your baby’s skin. For your baby, a temperature of about 37°C-38°C is safe enough. Any water hotter or colder than this may be harmful to your baby.

Without proper care, hot water can cause blisters to grow on your baby’s skin.

To avoid this, keep reading!


How To Acheive Optimal Bathwater Temperature

1. Get A Temperature Control System

If you use a hot water system, make sure it has a working temperature control device. With this, you can regulate the temperature of the water to a set point close to the safe temperature (37°C -38°C ).

2. Use Cold Water First

When you are preparing the bathwater, start with the cold water. Then add hot water until you get the right temperature. You can also do the same thing when you’re using a tap. However, turn off the hot water first so that the cold water can run through and cool it down.

baby-bath-temperature

3. Use A Thermometer

You can also use a thermometer to check the temperature of your baby’s bathwater.

In fact, there are some toy-themed thermometers made for this purpose. Once you get your desired temperature, all you need to do is turn off the tap and let your baby have all the fun in the world.

4. Feel The Temperature

If you can’t get a thermometer to determine the temperature, use your hand to feel the bathwater. If the water turns your hand red, imagine what it’d do to your baby’s skin. You can also use your hands to test the temperature of your baby’s bathwater.

baby water temprature


5. Use Child-Resistant Taps

These can be in form of anti-scald devices on taps. They help to keep the taps out of reach of your baby.

Extra Tips For Baby Bath time

  • Place all the bath items close.
  • Keep the room warm.
  • Ensure you have a firm hold on your baby during the bath to prevent him from slipping.
  • Give your baby undiluted attention during bath time.
  • Never leave your baby alone at any time.
  • Make bath fun for your baby, give him toys to play with during bath.
  • Keep your baby warm after bath, dry him with a clean towel.

Conclusion

By giving your baby a safe bath, you have already set a good stage for bonding with your baby. In addition, proper baths would protect your baby from various skin infections and leave his/her skin set for a healthy life. After a good bath, you can apply coconut oil or other baby skin products to get the best results.

Enjoy the moment with your baby and have a good mother-baby time!

References
  • Kendrick D, Stewart J, Smith S, Coupland C, Hopkins N, Groom L, Towner E, Hayes M, Gibson D, Ryan J, O’Donnell G, Radford D, Phillips C, Murphy R. Randomised controlled trial of thermostatic mixer valves in reducing bath hot tap water temperature in families with young children in social housing. Arch Dis Child. 2011 Mar;96(3):232-9. doi: 10.1136/adc.2009.175059. Epub 2010 Jun 16. PMID: 20554769.
  • Geissbuehler V, Eberhard J, Lebrecht A. Waterbirth: water temperature and bathing time–mother knows best! J Perinat Med. 2002;30(5):371-8. doi: 10.1515/JPM.2002.058. PMID: 12442600.

When Do Babies Start Walking?

For every parent, watching your child take his/her first steps is a thing of joy. In fact, walking is one of the most amazing and memorable developmental milestones for every child.

Sometimes, it may seem like this milestone was crossed overnight, especially when your little one has already started climbing chairs and tables. However, walking results from a series of physical, mental, and muscular changes.

In this article, you’d discover all you need to know about your baby’s ability to walk; the timeline, stages, and how you can help your baby achieve this milestone.

Read on to learn more!

When Do Children Actually Start Walking?

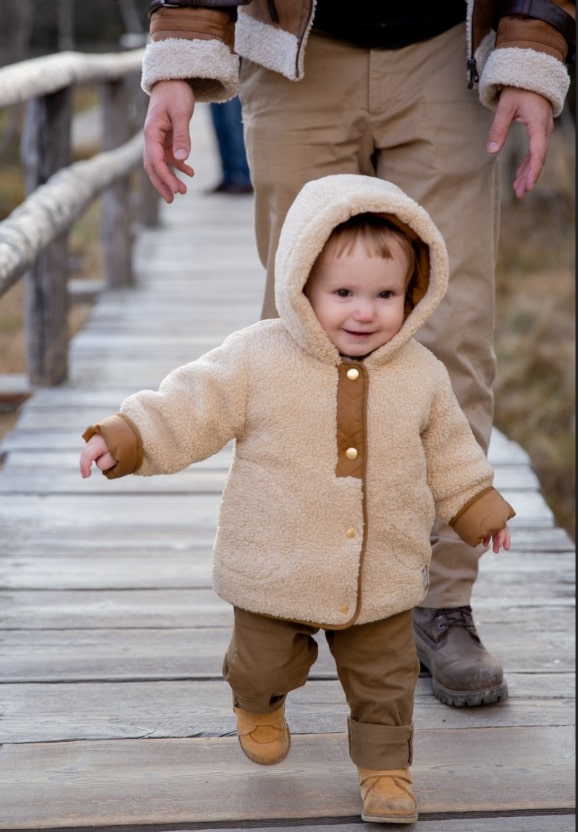
Some children begin to walk before the 1st year of life, around the time they start their stage 4 diet. In other cases, the first steps may come after the 1st year, usually around the 14th or 15th month.

Baby Walking

Although unassisted walking starts around the 12th to 15th month of life, it is important to note that there are other processes that lead up to your baby walking.

These pre-walking stages include:

  • Pushing up
  • Rolling
  • Sitting up
  • Pulling up
  • Crawling
  • Assisted walking

Even if your baby has crossed all of these pre-walking stages, it is very important to contact your pediatrician if your child hasn’t started walking by the 18th month.

The Stages Before Walking

As we mentioned earlier, there are certain boxes that must be ticked before your child starts to walk without help.

These stages include:

1. Pushing Up

As a newborn, your baby would have little to no neck or head control. However, the 3rd or 4th month of life comes with the ability to hold his/her neck up and push up while lying on their belly.

The pushing up stage is really crucial in the muscular development necessary for walking.

2. Rolling

Again, this comes in stages. At first, your child is probably going to roll from front to back. Eventually, he/she would discover that it is also possible to roll from back to front. Most times, the rolling stage happens between the 3rd and 6th months of life.

3. Sitting up

At this point, your baby’s back muscles are strong enough to support his/her upper body weight. As a result, you’d notice that your child can now sit up with little or no assistance. In most cases, the sitting up stage happens within the 4th and 9th months.

Baby Walking Teddy

4. Pulling up

Now, this is often a result of crossing an earlier pre-walking stage.

Here’s the fact: Babies are very curious. Once your little one gets the hang of sitting up, he/she would definitely want to get a taste of more. In this case, more means trying to get on his/her feet. This usually happens between the 8th and 11th months of life.

At this point, you’d begin to notice that your baby can pull him/herself upwards to stand while leaning on a chair or table.

5. Crawling

For most parents, the crawling stage comes with a lot of excitement (and work). Your baby may start to crawl at about the 6th month. Read this to learn more about crawling and how to help your baby crawl faster.

baby walking

6. Assisted Walking

At this point, your baby would have realized that it is possible to move around with some assistance. In fact, this new activity may be so exciting to him/her that they’d never want to stop holding your hand.

To help your little one move through this stage smoothly, it is important to make sure that he/she wears the right baby shoes, and your household furniture is safe and stable to lean on.

For most babies, the assisted walking stage occurs between the 6th and 13th months of life.

Signs to Watch Out For

As your baby crosses each of these pre-walking stages, there are several tell-tale signs that show how ready your little one is to take his/her first step.

To help you out, here are two of the most obvious ready-to-walk signs your child would demonstrate in this period:

  • The ability to stand upright with minimal assistance
  • Better body balance and coordination

How Can I Help My Baby Walk Faster?

As it is with every other developmental milestone, your baby needs as much help as he/she can get. Thankfully, there are a lot of ways to help your little one walk without assistance.

Baby Walking Father

You can do this by:

  • Creating an Exciting Trail: Yes, the same trick you used to help your baby start crawling still works. All you need to do is just create a path that places your child’s favorite items slightly out of his/her reach and watch your little one try out various methods (including walking) to get to his/her prized possession.
  • Provide Support: As we mentioned earlier, sitting and pulling up comes before walking. You can help your child walk faster by providing safe and stable surfaces he/she can lean on while pulling up. 
  • Hold Hands: As you play around the house, you can help your baby learn to walk faster by holding his/her hand while taking those cute little baby-sized steps.
  • Buy Comfy Shoes: In this period, while your baby learns to walk, his/her footies are super important. You need to ensure that the baby shoes you select are safe, padded, and comfortable. See our great tips on how to get the right shoe size for your baby here.
  • Be Patient: Babies learn in stages. In fact, the timeline of each stage is unique to each child. As you watch your baby learn how to walk, it is normal to experience stops and starts. All you need to do is wait, observe, and provide all the love, care, and assitstance that your child needs to thrive.

When to Speak with Your Pediatrician

As we mentioned earlier, patience is a key ingredient in this process. The truth is, every child develops at his/her own unique pace.

However, it is important to keep an eye out for any potential warning signs. Please contact your pediatrician if your baby hasn’t started crawling by the 10th month or has made no attempt to move in the 1st year of life.

This is really important because it may be a symptom of a more serious medical condition.

Conclusion

Don’t get bothered if your baby doesn’t transit smoothly through all the stages mentioned in this article. In fact, minor hurdles like trips or falls are absolutely normal as your child learns to walk. Sometimes, your baby may even take his/her first steps then switch right back to crawling!

This is not a cause for concern.

All you have to do is be patient, provide support and wait for him/her to gain the confidence and balance necessary for walking.

Enjoy the journey!

References

Adolph KE, Hoch JE, Cole WG. Development (of Walking): 15 Suggestions. Trends Cogn Sci. 2018 Aug;22(8):699-711. doi: 10.1016/j.tics.2018.05.010. Epub 2018 Jul 4. PMID: 30032744; PMCID: PMC6145857.

Iwata H. A statistical analysis of the factors that determine the age at which babies start walking. J Hum Ergol (Tokyo). 1991 Jun;20(1):27-40. PMID: 1820378.

9 Easy Ways To Help Your Baby Start Crawling

Crawling is an important milestone in your baby’s developmental journey. As it is with every milestone, achieving it brings joy and fulfillment. Other important milestones include sitting, standing, and walking. Although developmental milestones are natural and need not be taught, your baby still requires all the support you can provide in this period.

Are you anxiously waiting for your baby to crawl? Have you stopped to consider the part you’ve got to play in your baby’s crawling journey?

If your answer is yes, this is the article for you!

In this post, you’d discover all you need to know about crawling; what it is, the importance, and tips on how to help your baby crawl faster.

First, What Is Crawling?

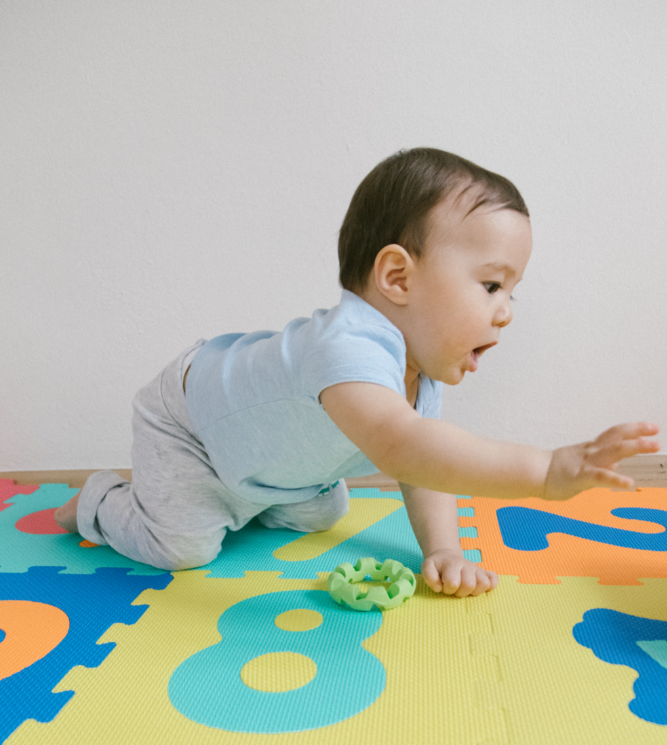
Crawling is a movement posture your baby displays on his/her developmental transition to walking. On their journey to walking like adults, some babies start by using their arms to pull themselves forward while their legs and stomach remain on the ground. In other instances, some babies use both their hands and knees to get around.

crawling

For most babies, crawling starts between the 6th and 10th months of life. However, it is important to remember that the timeline varies for every child.

How Important Is Crawling?

Studies show that motor developmental milestones, like crawling, have a sequential effect on the development of the social and cognitive function in your baby. As your little one begins to crawl, it is expected that he/she would become more interactive, communicative, and better suited to his/her environment.

Crawling is really important because it strengthens your baby’s neck muscles and holds his/her head in an upright position. In addition, crawling strengthens your child’s arms, hands, and fingers for the motor skills needed for a healthy life. Furthermore, this essential motor activity improves the fine control of movements that occurs in your baby’s wrist and knee joints.

baby crawl

Even in older children, the importance of crawling is still evident; especially in developing an overall body posture. In fact, the muscles developed in the crawling phase would help improve your child’s sitting, standing, and walking posture.

Crawling also helps your baby become more aware of his/her spatial position as they develop essential gestures, hold your gaze, and move around the house.

Tips To Help Your Baby Crawl

1. Give your baby adequate ‘tummy time’

Tummy time simply means placing your baby on his tummy.

For your baby to crawl, he/she must develop certain motor skills which depend on increased strength in the muscles of the stomach, neck, arms, back, and shoulders. With the right amount of tummy time, your little one can get this and so much more.

Furthermore, insufficient tummy time exposes your baby to the various risks associated with prolonged lying on the back. These risks include:

  • Developing flat spots at the back of the head (positional plagiocephaly)
  • Delayed mastering of basic body movements
  • Delayed achievement of other motor developmental milestones

Now, here’s a key fact: You don’t need to wait till your baby begins to roll over before introducing tummy time.

In fact, studies show that you can even begin tummy time at birth! It’s simple really, all you need to do is just place his/her head on your chest whenever you can. In addition to helping with the crawling phase, tummy time also provides the skin-to-skin contact needed for proper mother/child bonding and effective breastfeeding.

However, it is important to remember that your child should be placed on his/her back at bedtime to reduce the risk of sudden infant death syndrome. Hence, tummy time is only to be given when your child is fully awake and not alone.

If your baby seems to resist tummy time, by crying or being fussy, you don’t need to worry. Just remember that this is a new experience for him/her and you just have to take it slow.

2. Get on the floor and crawl with your baby

Yes, this works!

Babies find it easy to imitate what they see, so you may want to show your baby how it’s done by crawling with your baby when having tummy time. This really makes it easy for them, especially when you have a baby that loves to imitate everything you do.

In this instance, it helps to have other crawling babies in the family or neighborhood, so your little one can get to be among his/her peers.

3. Move your baby on his/her tummy.

While your baby is having tummy time, gently move your baby forward. As your little one grows, you can also place him/her in a crawling position and support the body weight whilst gently moving his/her hands and knees on the ground.

This affords a measure of safe crawling practice for your growing baby.

4. Help your baby strengthen his/her back.

You need to help your little one develop the strength in his/her back muscles before crawling begins. Now, how do you go about this?

It’s simple, really.

All you have to do is provide support when your baby tries to sit up by holding his/her back and head.

5. Encourage your child to look up

Help your baby practice looking up.

You can do this by dangling a toy in your hand over him/her, this will help strengthen the muscles in the back and neck. You can also hold his/her hand up while playing with him in a standing position. Furthermore, it helps to hold your baby’s gaze while playing to improve concentration.

baby crawling

6. Provide a wide and safe space

Your child needs to feel comfortable enough to crawl. To provide this, you need to ensure that the ground is soft and dry. You can even improve your child’s comfort by placing a blanket on his or her crawling area. Also, it is really important to make sure that this space is free from any sharp or harmful objects that can injure your child.

7. Encourage him/her to reach for objects.

Of course, by this time, your baby would have become really attached to one or more playing objects. You can use this to your (and your baby’s) advantage as he/she learns how to crawl.

All you need to do is just place this object slightly out of his/her reach during playtime. Then sit back and watch your child crawl towards that prized possession. Practicing this a few times every day will help your baby master the skill of crawling to get to where he wants.

However, you shouldn’t practice it too often as it may become boring to your baby.

8. Regulate the use of supportive devices

Keeping the baby on supportive devices such as car seats or strollers for a long time may be detrimental to their strength development. Instead, regulate the use of these devices and encourage him/her to move around, practice effective tummy time, and play with your child as often as you can.

9. Use a mirror

This works beautifully!

Your baby becomes fascinated when he sees himself in front of a mirror so he tries to reach for the mirror to see what’s exactly going on there. Try placing the mirror at a little distance away and make him aware by pointing to it. No doubt, your baby will try to move towards it by crawling all the way to it.

Conclusion

Finally, it is important to remember that babies begin to crawl at different ages. Sometimes, all you have to do is just be patient and support your little one in every way possible.

With the tips in this article, you’re on the right track. Enjoy the journey, Mama!

References

Hewitt L, Kerr E, Stanley RM, Okely AD. Tummy Time and Infant Health Outcomes: A Systematic Review. Pediatrics. 2020 Jun;145(6):e20192168. doi: 10.1542/peds.2019-2168. Epub 2020 May 5. PMID: 32371428.

Yamamoto S, Yonghi L, Matsumura U, Tsurusaki T. Diversity and regularity in infant crawling with typical development. J Phys Ther Sci. 2020;32(8):483-488. doi: 10.1589/jpts.32.483. Epub 2020 Aug 8. PMID: 32884166; PMCID: PMC7443550.

How To Care For Your Baby’s Umbilical Cord

Most relationships end at a point; including the one you share with the umbilical cord during pregnancy. Here’s the fact: it’s not you, it’s just normal. After birth, your little one no longer depends on the umbilical cord for gas transport and nutrient supply.

Thankfully, this is an expected sign of growth.

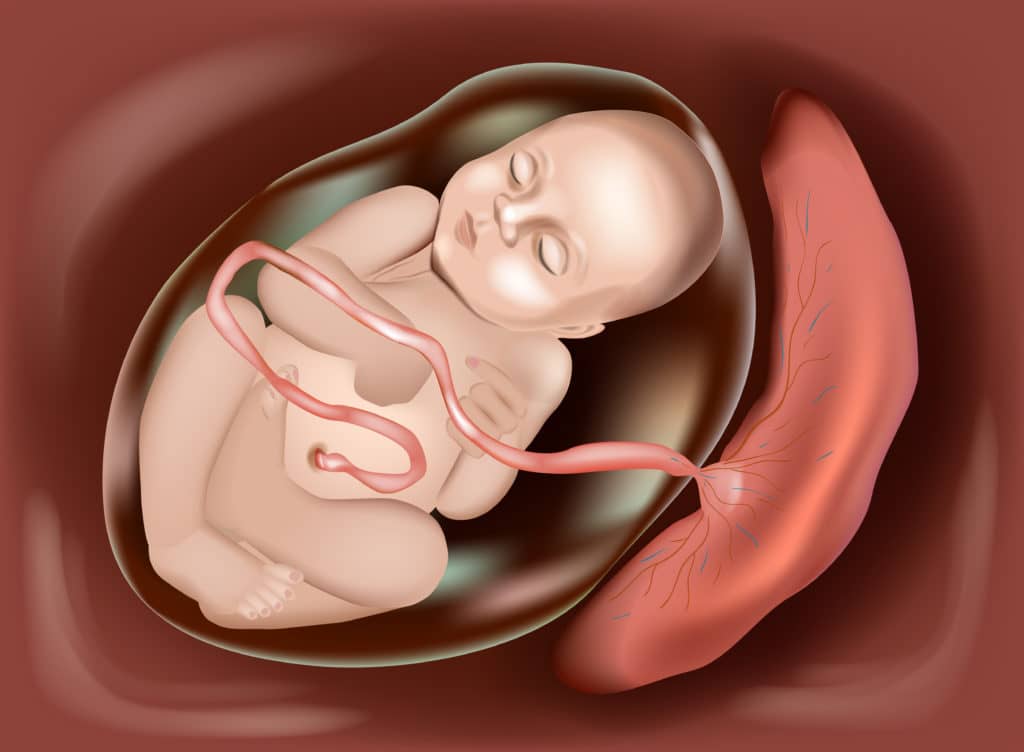
During pregnancy, your little one depends on you for oxygen delivery and nutrient supply. These demands are met by the combined action of the placenta and umbilical cord. In fact, any problem with the umbilical cord during pregnancy may lead to serious complications. Nevertheless, just like the placenta, the umbilical cord becomes non-functional immediately after delivery.

In this article, you’d find all the info you need about the umbilical cord; what happens to it after childbirth, and how to care for it. Furthermore, there’s a note on the signs and symptoms of umbilical cord infections.

First, What’s an Umbilical Cord?

The umbilical cord is a connecting tube between the placenta and your baby during pregnancy.

Umblical Chord

In this period, it functions in the transport of oxygen and delivery of nutrients to your little one. The functions of the umbilical cord also extend to the removal of your baby’s waste products during pregnancy.

What happens to The Umbilical Cord After Childbirth?

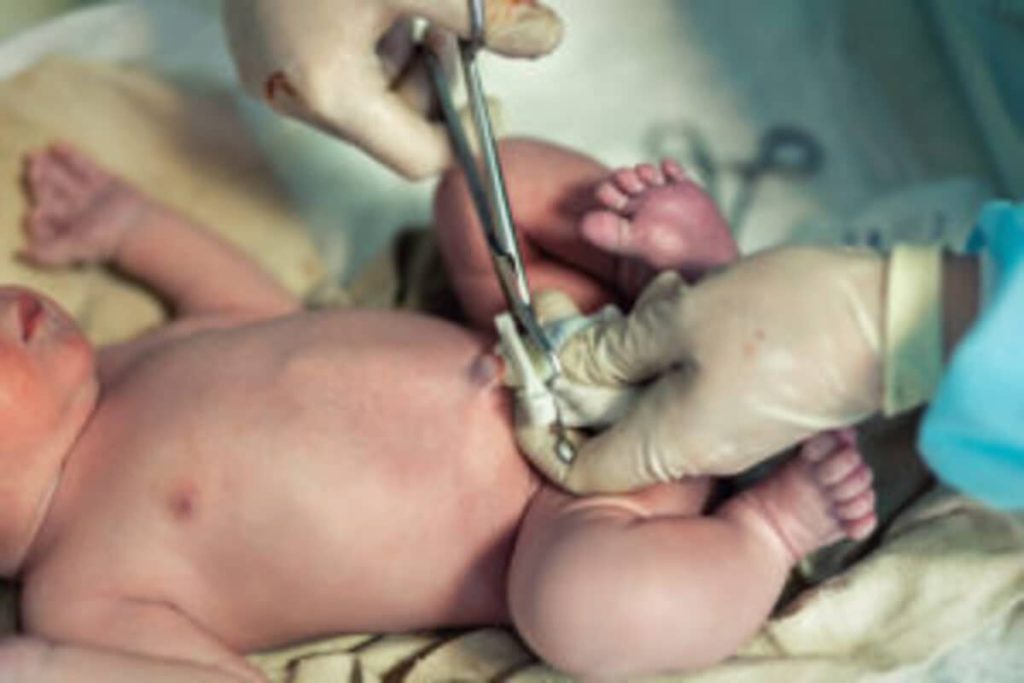
After delivery, the umbilical cord becomes unnecessary because your baby will learn how to perform respiratory and excretory functions on his/her own. As a result, your doctors would clamp the umbilical cord as a part of the vaginal delivery process or Cesarean section.

Umblical Cord Care

Don’t fret: the process of clamping and cutting the umbilical cord wouldn’t hurt your baby.

This is because the umbilical cord has no nerves, so there’s no pain to you or your baby.

Nevertheless, cutting the umbilical cord would leave a short stump (of about 1 inch) on your baby’s belly. In most cases, this stump falls off within the first three weeks of life.

Initially, the stump would look yellowish and very shiny. However, it would become grey, brown, blue, or purple as it dries out. Eventually, it would wrinkle, turn black, and eventually fall off.

Tips On Umbilical Cord Care

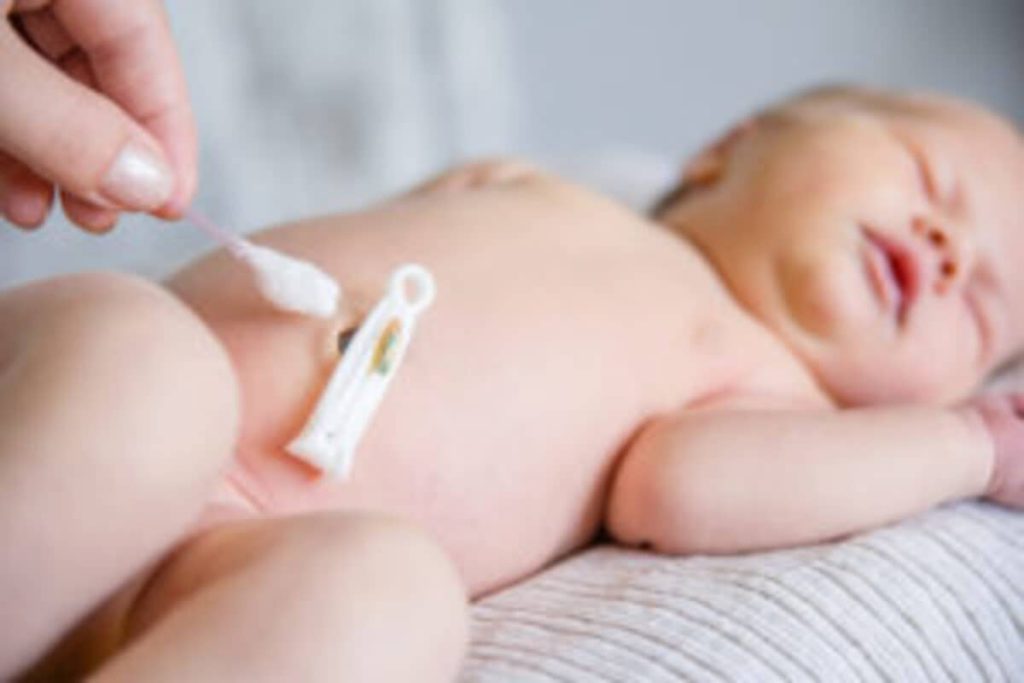
Before the cord eventually falls off on its own, you need to keep the stump clean. For this, pediatricians now advise “dry care” for the stump. This simply means that you should keep the cord as dry as possible and expose it to air to prevent infections.

Tips on Umblical Cord

To help you out, we’ve compiled the following umbilical care tips:

  1. Ensure your hands are clean before touching your baby’s umbilical cord. This prevents you from passing any germs from you to your baby.
  2. Ensure that the stump is clean and dry as much as possible.
  3. Be gentle with the stump as you clean it.
  4. Don’t try to pull off the stump with your hands: Allow the stump fall off by itself, you don’t have to help it.
  5. Avoid getting the stump wet.
  6. Give your baby sponge baths instead of tub baths: This helps to keep the stump dry as much as possible.
  7. You can expose the stump to air to help dry out the base.
  8. Fold your baby’s diapers: so that it rests below the cord in order to shield the cord from your baby’s pee and poo. This also allows air to circulate around the base of the stump and keep the stump dry. You can opt for diapers that have cut out areas for the cord.
  9. Clean the stump gently with soap and water if your baby has a messy bowel movement and some stool gets on the cord.

Possible Complications of The Umbilical Cord

Umbilical cord complications are rare. However, some health conditions are associated with the umbilical cord stump. In fact, improper umbilical cord care may lead to various infections that may be potentially fatal because the cord has a straight passage to the bloodstream.

Tips on Umblical Cord

Some of these complications include:

1. Umbilical Hernia

When this happens, a part of the baby’s intestine protrudes through the abdominal muscles near the umbilical cord. Usually, it is not very serious and resolves on its own by the second year of life. In other instances, it may become more serious requiring urgent medical attention.

2. Omphalitis

This occurs when the area around the stump of the umbilical cord becomes infected. Sometimes, omphalitis can be serious if the infection passes into the bloodstream.

Symptoms of omphalitis include:

  • Redness or swelling at the base of the cord
  • Leakage of fluid or pus from the cord
  • Foul smell
  • Fever

Most times when this occurs, your baby may be hospitalized for proper monitoring and treatment. Antibiotics will be needed for treatment.

3. Umbilical Granulation

This happens when a part of the stump remains after all other parts have fallen off. This small, reddish or pinkish lump does not hurt and your baby’s doctor can help to remove it by severing its connection with the body. This is done by tying off this stump remnant or freezing it with liquid nitrogen.

When to See Your Pediatrician

You should consult your doctor immediately if you notice any of the following:

  • Blood on the end of the cord: Minute bleeding may not be a sign of any infection, however, if the blood flow is heavy and does not look like it’s stopping soon, please call your doctor immediately.
  • If you notice a yellowish or whitish discharge from your baby’s cord.
  • If your baby cries whenever you touch the area around the cord. This may be a sign of pain around the cord.
  • Reddish or pinkish swelling of the cord.
  • Persistent umbilical cord stump: if your baby’s cord has not fallen off after three weeks, you should see your pediatrician immediately.

Conclusion

In conclusion, it is really easy to care for your baby’s umbilical cord stump and prevent infections. All you need to do is follow the readymade tips above and you’re good to go.

Your baby is going to grow up strong and healthy!

References

Tolulope O. Afolaranmi, Zuwaira I. Hassan, Ofakunrin O. Akinyemi, Sarah S. Sule, Matthew U. Malete, Choji Pam Choji and Danjuma A. Bello (2018). Cord Care Practices: A Perspective of Contemporary African Setting. Frontiers Public Health. Accessed on 9th October, 2021 from https://doi.org/10.3389/fpubh.2018.00010

Coffey, P.S. and Brown, S.C. (2017). Umbilical cord-care practices in low- and middle-income countries: a systematic review. BMC Pregnancy Childbirth 17, 68. Accessed on 9th October, 2021 from https://doi.org/10.1186/s12884-017-1250-7

Emma Sacks, William J. Moss, Peter J. Winch, Philip Thuma, Janneke H. van Dijk and Luke C. Mullany (2015). Skin, thermal and umbilical cord care practices for neonates in southern, rural Zambia: a qualitative study. BMC Pregnancy Childbirth 15, 149. Accessed on 9th October, 2021 from https://doi.org/10.1186/s12884-015-0584-2